
I first got the idea for making headbands and hair ties for fund raising events during the felting camp at the Jondaryan Woolshed in Oct last year. Wendy Bailey had some very pretty hair ties with large felt flowers felted onto foam curlers. I had dismissed the idea as the ties appeared a little bulky for children's pony tails.
A few months later Abbie Vievers was visiting and over a cup of coffee I listened while she brain stormed ideas for an Open Day at the Serendipity Farm Animal Centre on October 22. I then remembered Wendy's pretty ties and thought they would be great for a felt demonstration and as a fund raiser. The bulkiness of the tie, and the time needed to make the flower, was a concern. I needed to simplify the process. Once again it was put on the back burner .....until I read an article in the 5th Issue of Felt Magazine by Anita Larkin "Felting around wire..Fungi Bracelet". She used Corriedale wool which gave it a rustic look. I became excited when I found I had all the materials at hand .....recycled fly screen tubing from old screen doors, wire from repairing the fence and of course various types of wool.
I found Anita's process, while effective was awkward, and I needed to be simplify it if children were to felt wire on Open Day. I also needed to find a decoration that could be made quickly and still be as appealing as Wendy's flowers. I found the solution in Christine White's Uniquely Felt ..."Bodacious Bamboo" page 49.
So here is my version for felting around wire:
I decided that bracelets would be something quick and easy for the girls to make and snakes and lizards for the boys. I wrapped the ridged fly screen tube (spline) around my wrist and let the ends overlap about an inch. This should be a good length for the children's bracelets, hair ties and little snakes and lizards.
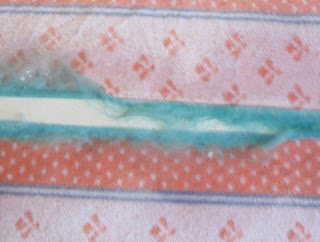
The tubing can be found at hardware stores for about 60c metre or a little cheaper in packs of about 13 metres. I used galvanised wire from my tool box. You can see the wire size in relation to the tube in the photo.


You will notice that the wire has a curve (a memory) which persists through out the process. This can be used to advantage. First the wire was bent back onto the topside of the curve to reduce the risk of scratching when worn. The wire was stroked along the length when shaping to avoid kinks. However any shaping was avoided until finished.

Using a template: I used exactly the same process as I do when felting hats, bags etc. I cut a piece of lino (floor vinyl) one and a half times the length of the tube and about inch wide, to use as a template. Fine Merino tops were laid across the template and a thin layer down the length. It was then dampened down and felted with netting over the top till I was able to turn it over.
The sides were folded in and tops were laid on the second side. At times I found very little wool was needed on the second side as the folded sides often cover the side quite well. I did need to do a full layer on the one in this photo though. When it felted well and straining at the edges..... the ends were cut and the template pulled out. To pull template out the felt tube was pushed down like a sock part way and then grabbed at the bottom and pulled off. The tube is very fragile at this stage so go slow.

Covering the ends: Next some wool was hooked in the wire ends and pliers used to fix it firmly. Here my method varies again from Anita's. The wool is held between finger and thumb and the wire twirled so the wool winds around the tube and wire like a "cotton bud". This gives a good cover over the wire end. When both ends were covered the wire tube was pushed into in the felted tube. The ends of the felt tube were pulled over the first "cotton bud".

To felt the tube: Wet the end thoroughly with soapy water and gently rub the felt ends together. As it starts to felt together the end can be rolled on a wet towel or between the palms. When the end has felted onto the wool that was twirled around the wire ... push the felt tube up the wire and repeat the process on the second end.

Felt both ends well before felting the middle. To start the process roll the wire felt between the palms as if washing you hands. Move the folds up and down as you felt to avoid them felting onto themselves. The folds will shrink and disappear as you roll.

Last stages of rolling. Rolling on a wet towel helps in speed up the final process. Putting it into hot water and then using a mallet as Anita suggests to shock the felt is also an option.
The wire felt finished ready for decoration. I found this basic method quite quick and perfect for children on Open Day


That was great instructions for the felt bracelet, I too, had made them with Anita's instructions which were very inspiring but I had a little difficulty, and now with the adapted method I can hardly wait to make more...thanks so much for posting this.
ReplyDeleteWhat a wonderfully helpful and informative post!
ReplyDeleteI've never tried anything like this, but now I know I have a resource at hand for when I'd like to give it a whirl.
Thanks so much!! XXO-